HTTPS (SSL) protection
Get HTTPS protection on your webhosting plan with an SSL certificate – order from us, import your own, or use Let's Encrypt directly in the control panel.
We offer installation of SSL certificates and thereby HTTPS protection on our web hosting plans.
You can either order your SSL certificate through us, import your own certificate, or use Let's Encrypt.
Read more about HTTPS protection for web hosting plans under the "Website" menu item in our control panel.
Enabling HTTPS protection
After you have received your SSL certificate, you need to apply your SSL certificate to the hostname you want to protect with HTTPS, under the "Website" and "HTTPS Protection" menu items in the control panel.
Redirecting to HTTPS
After enabling HTTPS protection, your site will respond to both "http://" and "https://" calls.
If you want to redirect automatically to HTTPS, this can be done by enabling "Forced HTTPS", also under HTTPS Protection in the control panel.
Insecure elements (Yellow padlock - Grey URL)
Once you have enabled HTTPS on your site, it is important that, in your HTML code, you only fetch content from https:// pages, otherwise the browser will display a warning.
If you see a yellow padlock in your browser, you should therefore go through your HTML code for insecure (http://) elements.
See e.g. https://developer.mozilla.org/en-US/docs/Web/Security/Mixed_content/How_to_fix_website_with_mixed_content
HTTPS on subdomains
You need an SSL certificate for each subdomain you want to protect. You can also order a wildcard certificate, which covers all subdomains.
Let's Encrypt
You can set up Let's Encrypt directly via our control panel, under Website > HTTPS protection.
In the drop-down menu next to the hostname you want to protect, you can simply select "Let's Encrypt DV certificate".
For Let's Encrypt to work, the domain must point directly to the Simply.com web server, and the /.well-known/ folder must work and must not, for example, redirect elsewhere. When you set up Let's Encrypt through our control panel, our system will check that this is not the case and only allow you to activate Let's Encrypt if the above is fulfilled, thereby ensuring that Let's Encrypt will work.
Once Let's Encrypt has been activated correctly, our system will automatically take care of renewing the certificate.
Own certificates
Generating a CSR request
If you order the SSL certificate through us, we will take care of creating your CSR request and your private key.
You can also order your SSL certificate through a third party, but then it is up to you or the provider to create your CSR request for you. Unfortunately, we cannot help with that part. You may want to use https://csrgenerator.com/
Certificate import can be done in OpenSSL (PEM, x509, Apache-ModSSL) format.
Renewing SSL certificates
An SSL certificate cannot, as such, be renewed. Instead, you need to order a new certificate for the same hostname as the previous one, and replace the old certificate with the new one. Once the new certificate has been validated and issued, you can start using it by activating it under "HTTPS Protection", and then delete the old certificate.
Once the certificate has been validated and issued, you need to go in and remove the old one, after which you can make the new certificate active.
In the control panel under Website > HTTPS protection, you can click "Remove HTTPS protection" and then select the certificate in the drop-down menu.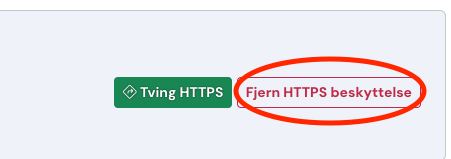
Cloudflare Origin Certificates
If you use Cloudflare for your website, you can benefit from using a so-called Cloudflare Origin Certificate. It is a free SSL certificate, issued by Cloudflare, which secures the connection between Cloudflare and your web server at Simply.com.
You can import the certificate in our control panel under Website > HTTPS protection, in the same way as other certificates in OpenSSL (PEM) format.
Note that a Cloudflare Origin Certificate can only be used when your domain's traffic goes through Cloudflare (proxied/orange cloud). The certificate is not signed by a publicly trusted certificate provider, so if someone visits your website directly, bypassing Cloudflare, the browser will display a certificate error.
Article from the support category: General
