Setting up email in Outlook App (Android)
How to set up your Simply-mail in the Outlook app on Android using IMAP settings and troubleshooting tips
How to add your email account in Outlook for Android.
NOTE: Any reference to test@simply-example.com should of course be replaced with your own email address.
- Open the Outlook app.
If this is your first time using the app, you will be presented with this screen:
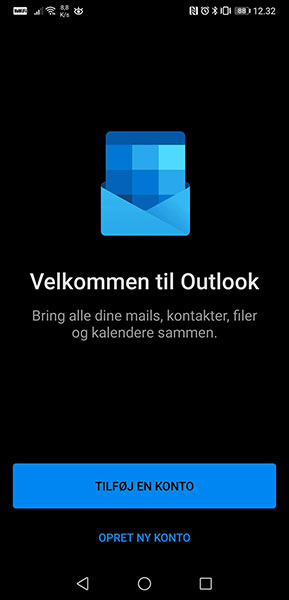
Tap Add an account.
If you already use the app and just want to add another mail account, you can tap the folder icon:
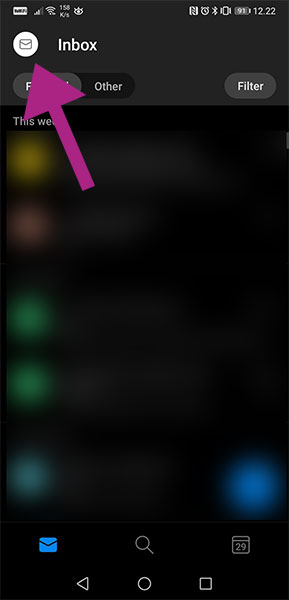
Then tap:
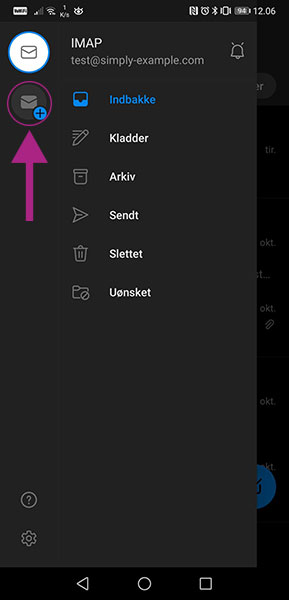
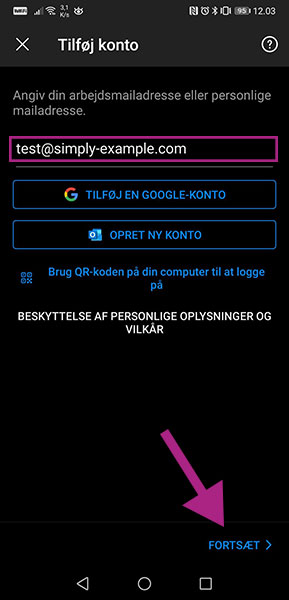
- Add account
Enter your email address and tap Continue.
- Choose account type
We recommend that you select IMAP.
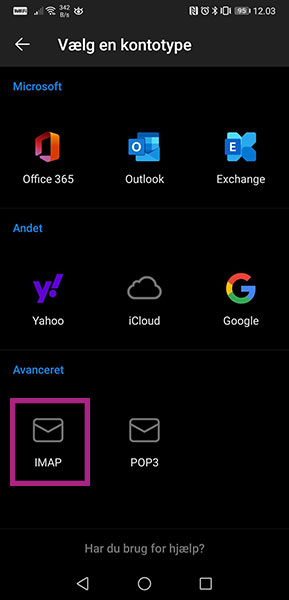
- Connect to IMAP
Enter the following:
Email address: Your email address
Password: The password for your email address
Display name: Your name
Description: This is optional, whether you want to fill in this field. We recommend that you enter your email address here.
When you have entered these details, tap Advanced settings.
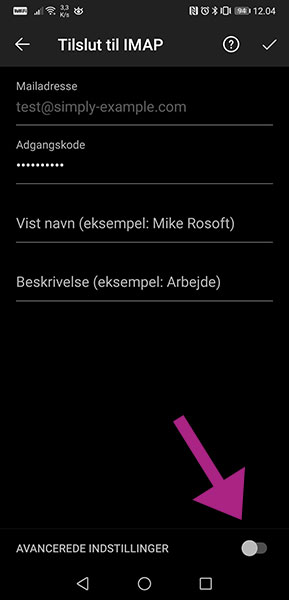
- Enter Advanced settings
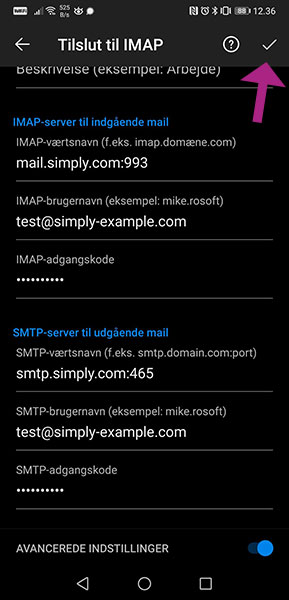
IMAP server for incoming mail
IMAP host name: mail.simply.com:993
IMAP username: Your email address
IMAP password: The password for your email address
SMTP server for outgoing mail
SMTP host name: smtp.simply.com:465
SMTP username: Your email address
SMTP password: The password for your email address
When you have entered all settings, tap the tick mark indicated by the arrow in the picture.
Problems connecting?
The Outlook app is not flawless. Often the app will fail to connect after the account has been set up. This issue is usually resolved with the following steps:
- Remove the account from the Outlook app
- Uninstall the app
- Restart the device (important)
- Reinstall the app
- Add the email account in the app again
If you continue to experience problems connecting to the email account in the Outlook app, make sure you are using the exact details listed in the guide above. If that is the case and you still cannot connect, you can contact our support for further assistance.
Article from the support category: Mail
